refitting and repairing a linen tunic.

origin story.
I made this tunic for an ex-boyfriend. Initially I made it too narrow for him, so I had to patch in a couple of panels to make it big enough to fit. Fast forward a decade or so, and I started fighting, so I needed boy clothes to wear with my armor. I found this, and since I am neither 6’4” nor as broad shouldered as he, I decided to remake it for myself, and in the process, finish the seam allowances. Scroll down for the transformation story.

trim away the fray.
The first job was to trim away the frayed threads so I could see what I was working with, and then take out the panels I had added to make sure the tunic fit him. There was a lot of fraying.

attend to the seams.
All the seams needed to be finished For the most part, I even had enough seam allowance to turn them under and flat fell them. Unless I didn’t.

this one got flat felled.
I pressed the seam allowances open, trimmed one side, then pressed the longer seam allowance over the shorter one, turned the raw edge under, and sewed it down with an overcast stitch. (For more information on flat felling a seam, see my handout: Sewing Sturdy Seams.)

…and this one didn’t.
This is another method of finishing seam allowances. I don’t usually finish hand-sewn seams like this when I’m working with linen, but as this tunic was originally machine-sewn, I didn’t really worry about it. I pressed the seam allowance open, turned the raw edges under, and sewed the edges down with an overcast stitch. It too gives a neat and tidy finish, and works well when there isn’t enough seam allowance for flat-felling.
Sometimes, though, there isn’t even enough edge left for that…

this was a fortunate happenstance. no, really.
Luckily, this isn’t a seam I needed to save. This was a seam holding one of the two panels I needed to remove from the tunic to refit it for me. Obviously, though, my lack of finishing caused this seam to entirely fray away at this point, and it would have required patching to repair it.
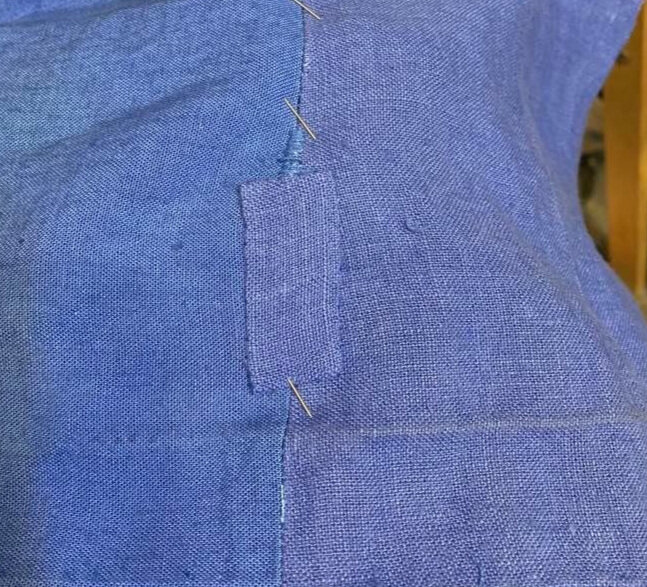
this is how you patch a seam.
I patched the areas on seams where it was too badly frayed to sew back together and finish the seam allowances. This patch is on the outside because there was virtually nothing left, and this looked better. Apparently I also tried to sort of darn this area back together as well, but I don’t remember doing that.
The nice thing about this being a fighting tunic is that I care somewhat less about how it looks, and thus this was a great project for learning on.
there was one small hole in the tunic itself.
Again, this a fighting tunic. I wasn’t all that interested in being super precise about patching, so I just smacked a patch over this small hole on the back hip of the tunic. If it was something that I wanted to look pretty (and it was in a more visible area), I’d have cut away the frayed bits, put the patch on the back, and whipped around the hole to prevent further fraying. But I didn’t. (Yeah, the colors are different. It’s the same patch. Lighting is a thing.)

